Physical Address
304 North Cardinal St.
Dorchester Center, MA 02124
The AWS CLI gives you a way to interact with Amazon Web Services (AWS) via command line. This comes in real handy when you need to automate tasks such as scaling EC2 server instances, uploading files to S3 buckets, moving files to Amazon S3 Glacier, etc. We’ll be focusing on installing AWS CLI on server operating systems in this article.
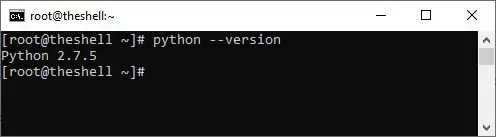
AWS CLI requires Python to function and Python PIP to install. We verified and the minimal install of CentOS 7 comes with python 2.7.5 (at the time of writing this article), confirm this by issuing the following at the terminal
python --version
You should see something like this:
Having verified that python is installed and functional, we can proceed with installing Python PIP (note: this will be Python2 PIP)
To do so we’ll need to install the EPEL repo first:
yum install epel-release
Now we can install PIP
yum install python-pip
Update the newly installed PIP
pip install --upgrade pip
We’re done with the prerequisites and can now install the AWS CLI
pip install awscli
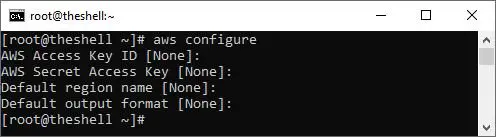
You have AWS CLI installed but now need to provide credentials so you can use it, issue the following command to start the configurator
aws configure
You’ll be prompted one by one to enter AWS Access Key ID, Secret Access Key, Default Region, and Default Output format. It’ll look like this:
If you already have these then add them as required otherwise follow below to get these from your account.
You can do this one of two ways, you could provide the access keys to your root account (the account you log in with), or you could create a new user and only set permissions for services that you require. We’ll be going over creating a new user with restricted access below:
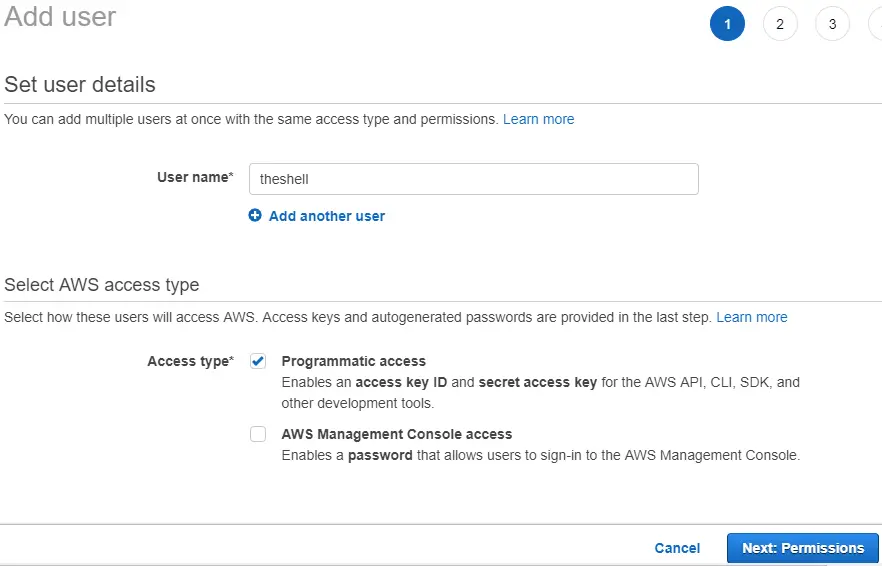
Create a new user for your AWS Account.
First, you’ll need to login to your AWS account via the AWS Portal, navigate to:
https://console.aws.amazon.com/console/home
Head over to the Users section in IAM and add a new user:
Hitting Next will take you to the service permission screen
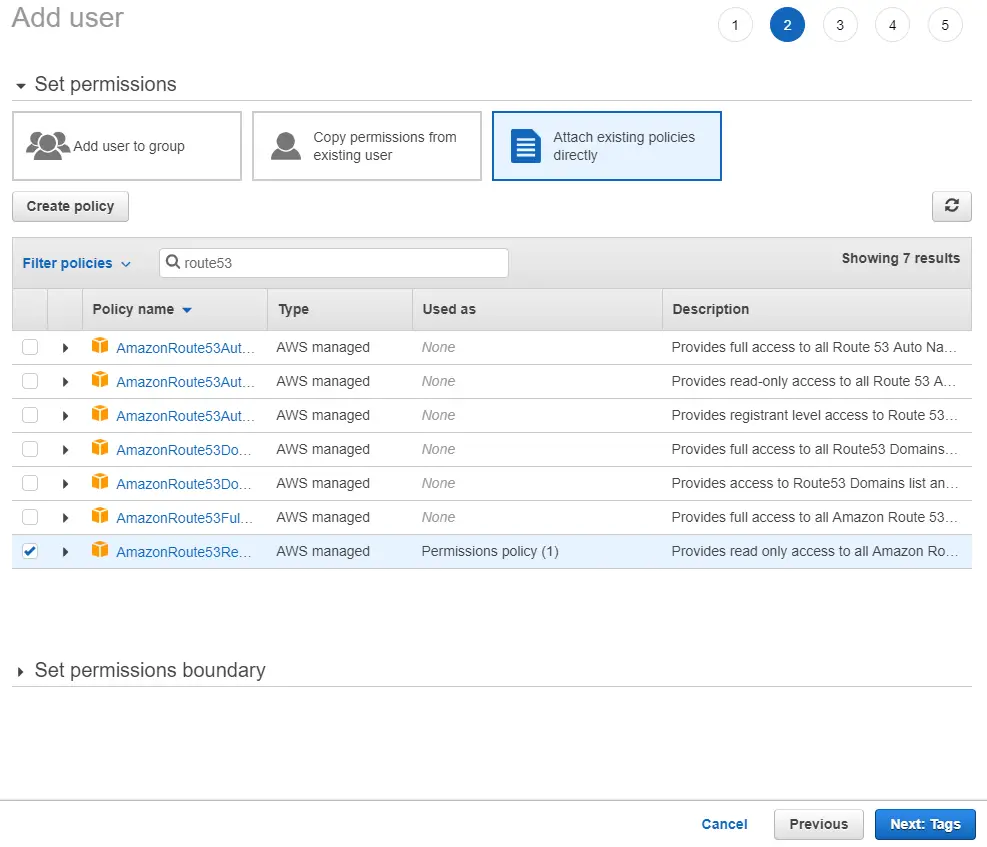
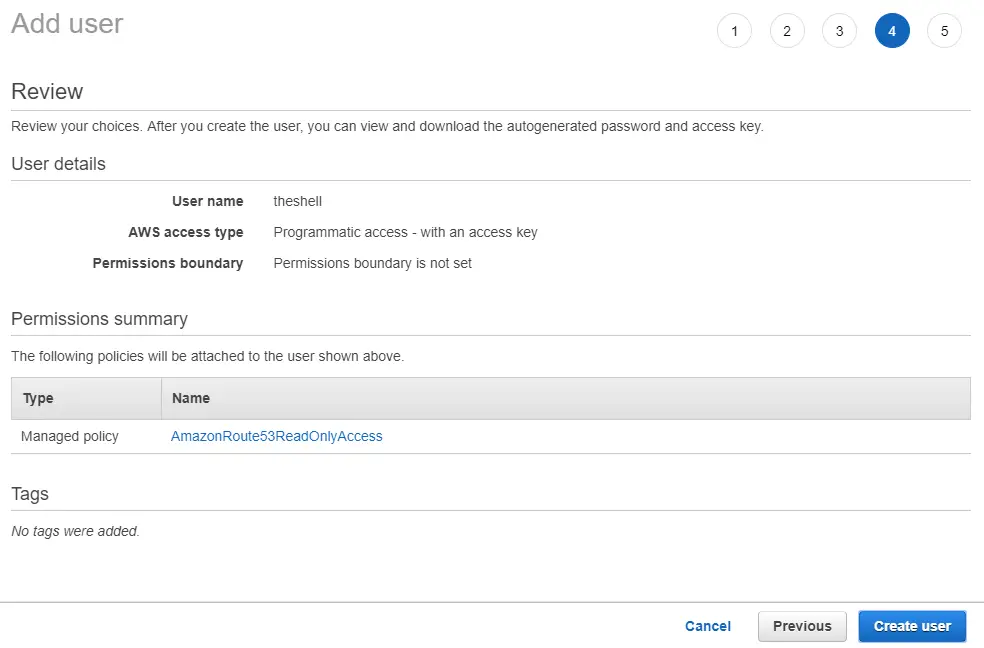
From here you have a couple of options, a lot actually. You can either give full read/write permissions to the new user for all the services or pick and choose. For this example, we’ll be giving our user read-only access to Amazon Route 53.
Hit Next, then Next again and finally Create User.
You’ll see the following screen once the user is created
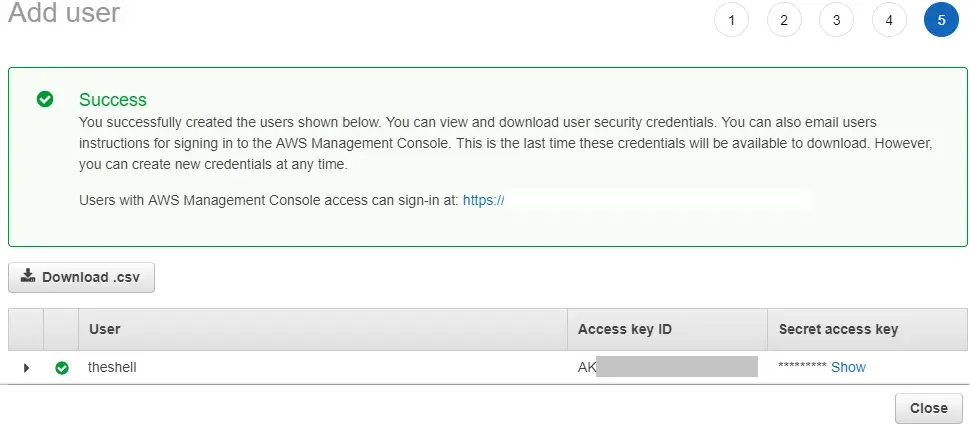
Note down the Access Key ID and Secret access key, be careful never to share these keys.
These are the details you’ll be adding to the configuration part of AWS CLI above.